
The Rose has but a Summer reign,
The daisy never dies.
The daisy's for simplicity and unaffected air.
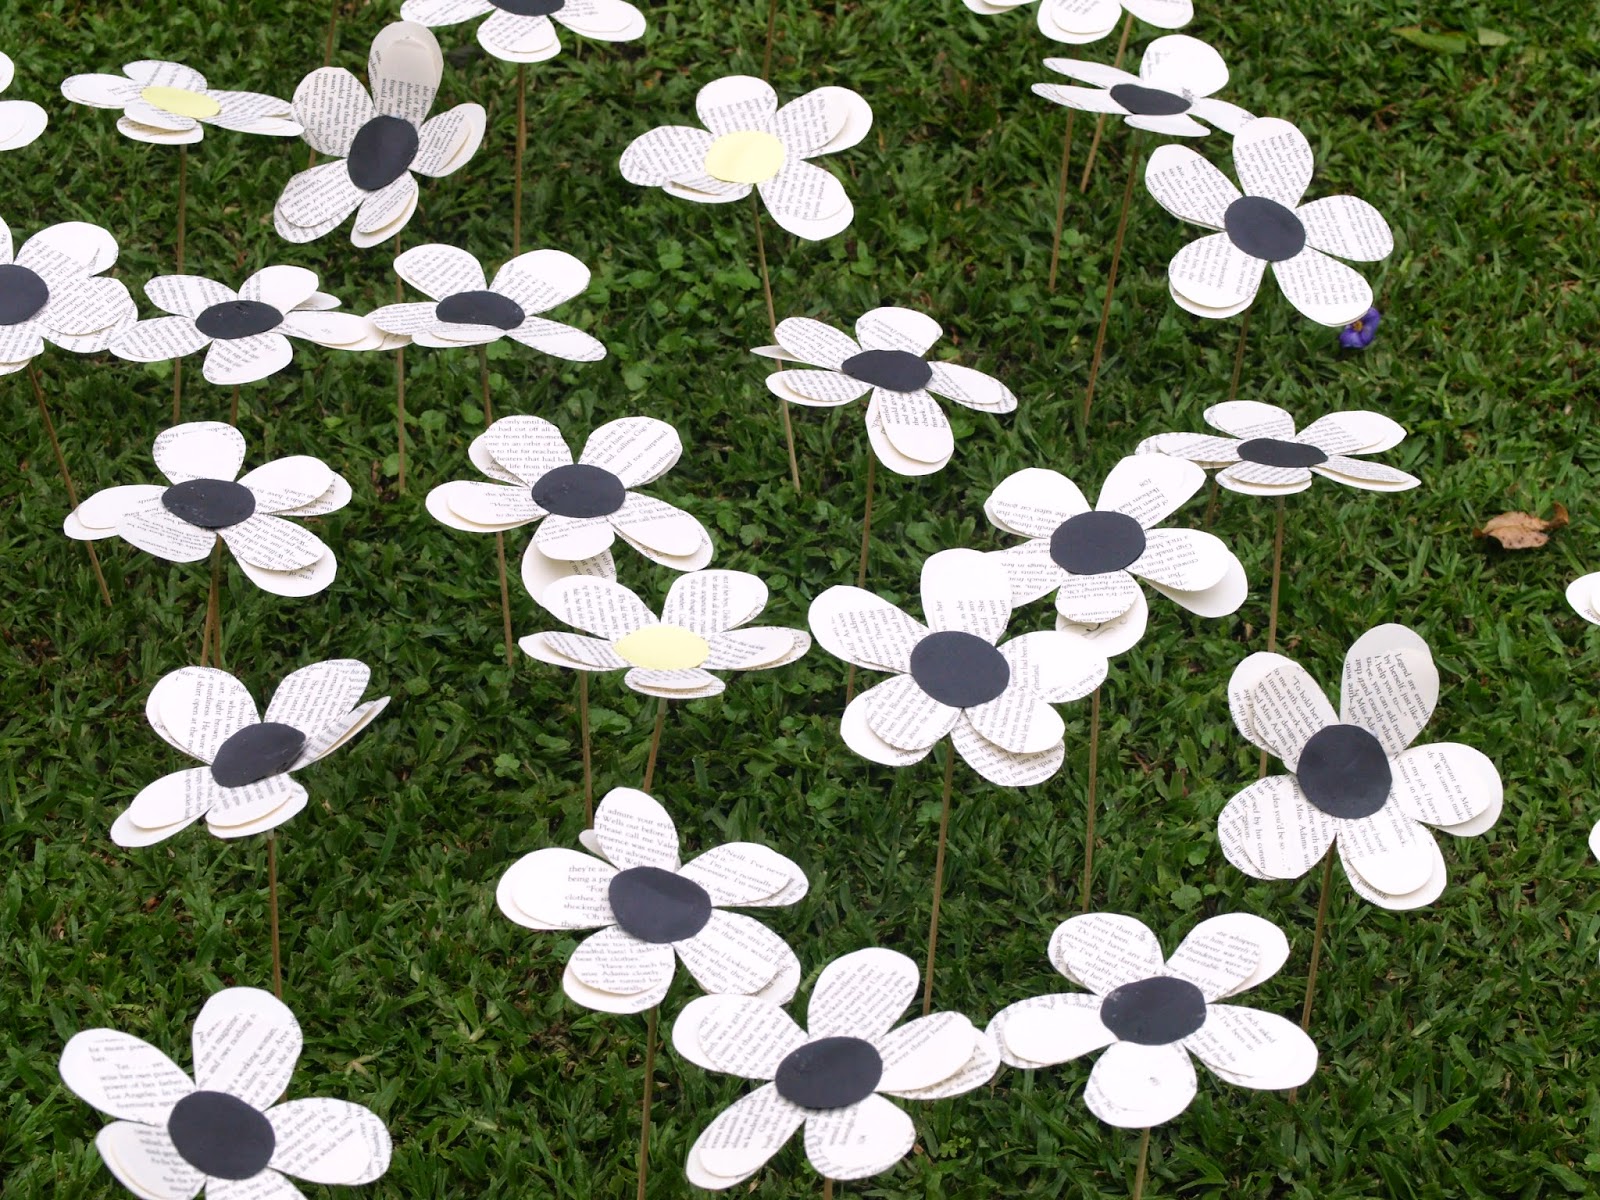
I'd like to introduce you to a freshly found paper batch of those simple long lasting flowers that the quotations above describe so beautifully.
Quick to make, cheerful and fresh as a daisy - these paper pretties are ideal for outdoor occasion decor. They could lead you along a pathway, brighten a garden patch, or add importance to an entrance.


How-to Make Paper Daisies
You will need:
- Paper - use recycled book paper for the petals if you like
- - contrasting coloured paper for the circular flower centres.
- Cocktail sticks
- Masking tape
- Wood glue
Method:
- Make a few prototypes first, to make sure it's to your liking, before you go into mass production
- Use the petal pattern below. Copy and paste the pattern onto an A4 work sheet. Shrink or enlarge the petals to your liking. If you are using book paper, make sure the pattern will fit onto the book page.
- If you would like a double layer of petals, create a 2nd template just a few mm smaller for the top layer.
- Print the pattern. Use this pattern to cut the paper petals out. Place the pattern on top of about 2 or 3 layers of paper and cut through all the layers at 1 time. Use a bulldog clip to secure the pattern on top of the paper while you cut. Cut on the solid outline and then into the centre. Cut the small hole in the centre.
- Wind a small piece of masking tape around the top 2-3cm of a cocktail stick. This is to give something for the petals to be glued on to.
- Place the small 6th petal under the 1 st petal and glue it in place using a touch of wood glue. This will form the petals into a cupped shape. Repeat with the 2nd layer of petals.
- Pull the petal round up the cocktail stick from the pointy end towards the end with the masking tape. Gently pull the petals over part of the masking tape. There should be enough masking tape wrapped around the stick for the petal round to fit quite firmly.
- Place a few dabs of glue on the inside to secure the petals in place. Repeat with the 2nd layer of petals.
- Gently fold the petals out flat.
- Cut a contrasting petal centre from the circle pattern. Glue around the edges of the circle in place to cover the stick end.

Here's a close-up showing how it's done:

Here's The petal pattern:

1 comment:
I love these! They look so pretty.
Post a Comment