

It’s been very pleasing to see beautiful angular terrariums in so
many places lately. The vibrant geometric shape softened by the fresh
green leaves of the resident plants makes a great decor item.
A paper terrarium is an innovative variation of the original – lighter, recyclable, and easy to make at home. It can store small potted plants, plant material in tiny (glass salt-cellar) vases and as a display case for other collections.
A paper terrarium is an innovative variation of the original – lighter, recyclable, and easy to make at home. It can store small potted plants, plant material in tiny (glass salt-cellar) vases and as a display case for other collections.

By the way – Do you know the origin of the terrarium? Like many other intriguing items, it was discovered by mistake.
In 1829 – a doctor Nathaniela Bagshaw (What a lovely middle name) Ward had a medical practice in London. He loved to grow plants in his back yard, but they struggled because of the pollution. Not only did he love plants, but he enjoyed insects too. One day he put a chrysalis in a bottle with some soil in order to observe it. To his surprise he noticed some plants starting to grow and thrive in the glass jar. Protected from the toxic environments, they thrived for years.
So he began to manufacture glass cases. They were named after him and known as Wardian Cases. During the Victorian era they became very ornate.

Display container names:
Terrarium – holds earth and plants,
Aquarium – holds water and water animals,
Vivarium – holds snakes.
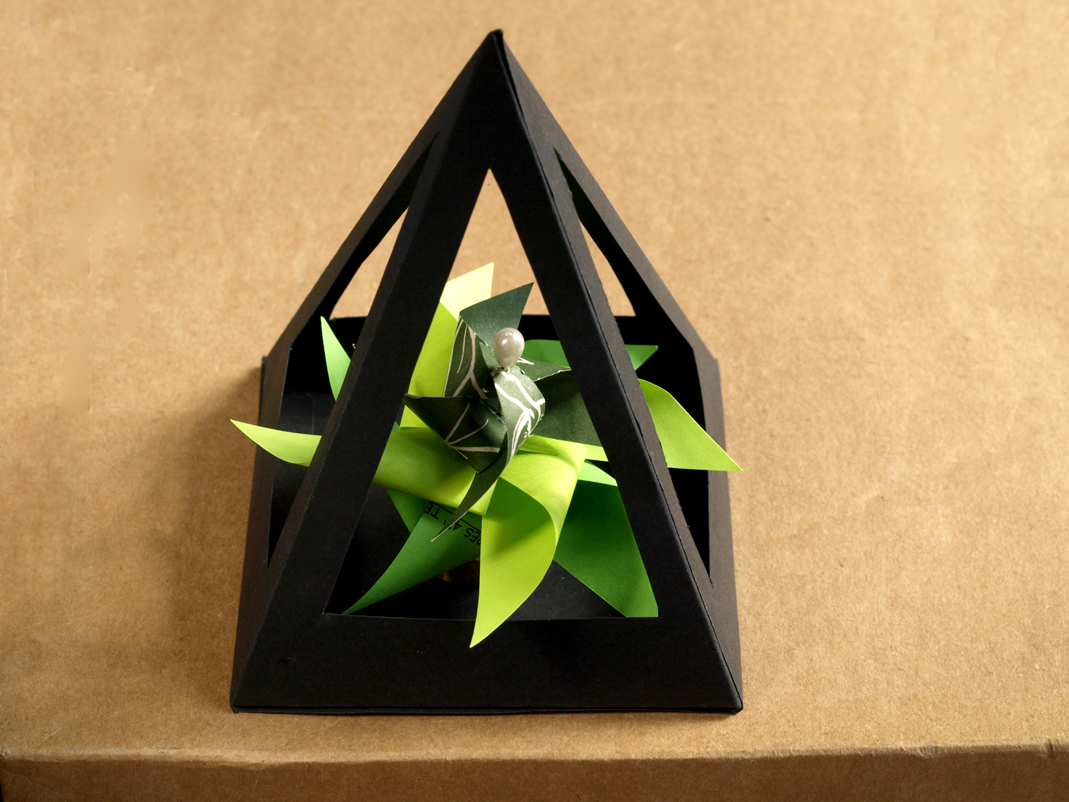
Curatorium – The name I gave to this paper creation. A place or a 3D frame for keeping carefully curated items or collections.
(A traditional curator works with artwork, collectibles, historic items or scientific collections. The Curatorium can house special items or sentimental collections)
Terrarium – holds earth and plants,
Aquarium – holds water and water animals,
Vivarium – holds snakes.
Curatorium – The name I gave to this paper creation. A place or a 3D frame for keeping carefully curated items or collections.
(A traditional curator works with artwork, collectibles, historic items or scientific collections. The Curatorium can house special items or sentimental collections)

You will Need:
An A3 sheet of paper (120gsm)
Scissors
Bull dog clips to keep the pattern in place while cutting
A cutting blade (optional)
A knitting needle or bone folder
Glue
Ruler
An A3 sheet of paper (120gsm)
Scissors
Bull dog clips to keep the pattern in place while cutting
A cutting blade (optional)
A knitting needle or bone folder
Glue
Ruler
Instructions for the Curatorium Paper (Terrarium):
1. Print out the pattern and cut it out. Join the sections of the pattern, matching the triangles2. Place the pattern on cardboard.
3. Cut out on the outside lines, using bulldog clips to secure the pattern in place while you cut.
4. Keeping the template in place, score the fold lines. Use a blunt pointed object (knitting needle or the back of a knife.
5. With the template still in place, fold all the fold lines.
6. Remove the template. Re-fold the lines crisply.
7. Use the triangular window template to mark the window cut-outs. The template should be centred in each panel, and positioned about 2 cm up from the base line.
8. Cut out the window with a craft knife or with scissors, by gently poking the scissors into the centre of the area to be cut-out, and then proceeding along the cut lines.
9. Place wood glue on the lower tabs, and glue underneath the base.
10. At this point, insert a button and thread if you would like to hang it.
11. Glue the final side tab into place.
12. Fill with delightfully curated items
2 comments:
What a fabulous tutorial. It's a great idea that can be adapted for so many things I guess. Thanks for sharing. Take care Zo xx
Thank you Crafty ... Zo ☺
Post a Comment